mirror of
https://github.com/Joxit/docker-registry-ui.git
synced 2025-04-29 08:29:54 +03:00
137 lines
5.7 KiB
Markdown
137 lines
5.7 KiB
Markdown
# Token Authentication with Keycloak
|
||
|
||
In this example, we'll see how to configure your keycloak server and use token authentication with your registry. This will use the [docker registry v2 token authentication protocol](https://docs.docker.com/registry/spec/auth/token/).
|
||
|
||

|
||
|
||
In this image, we will replace the docker client/daemon by the Docker Registry UI. Here are the steps:
|
||
|
||
1. Attempt to get a resource (catalog, image info, image delete) with the registry.
|
||
2. If the registry requires authorization it will return a `401 Unauthorized` HTTP response with information on how to authenticate.
|
||
3. The **docker registry ui** makes a request to **keycloak** for a Bearer token.
|
||
1. Your browser will use the [Basic Access Authentication Protocol](https://en.wikipedia.org/wiki/Basic_access_authentication#Protocol). But keycloak does not support this protocol... That's why we need a nginx proxy on top of keycloak.
|
||
2. Your proxy will receive a request on `/auth/realms/{realm name}/protocol/docker-v2/auth` without `Authentication` header. It will return a `401 Unauthorized` HTTP response with `WWW-Authenticate` header.
|
||
3. Your browser will ask you your credentials.
|
||
4. The proxy will pass the credentials to keycloak.
|
||
4. Keycloak returns an opaque Bearer token representing the client’s authorized access.
|
||
5. The **docker registry ui** retries the original request with the Bearer token embedded in the request’s Authorization header.
|
||
6. The Registry authorizes the client by validating the Bearer token and the claim set embedded within it and begins the session as usual.
|
||
|
||
:warning: If you are configuring from scratch your own keycloak server, remove files in `data` folder first with certificates in `conf/registry/localhost.*`
|
||
|
||
## Configure your nginx/proxy server
|
||
|
||
I will highlight required configuration for Basic Access Authentication Protocol. Replace the `{realm name}` by the name of your realm. In my example the realm is master, but you should create your own realm for your users.
|
||
|
||
```nginx
|
||
resolver 127.0.0.11 valid=30s;
|
||
set $keycloak "http://keycloak:8080";
|
||
|
||
# Location to get keycloak token
|
||
location /auth/realms/{realm name}/protocol/docker-v2/auth {
|
||
proxy_set_header X-Forwarded-Proto $scheme;
|
||
proxy_set_header Host $host;
|
||
proxy_set_header X-Forwarded-Host $host;
|
||
# By default, keycloak returns 400 instead of 401, we need to change that
|
||
if ($http_authorization = "") {
|
||
add_header WWW-Authenticate 'Basic realm="Keycloak login"' always;
|
||
return 401;
|
||
}
|
||
proxy_pass $keycloak;
|
||
}
|
||
```
|
||
|
||
Start your nginx server. It will be available on http://localhost/ in my example.
|
||
|
||
```sh
|
||
docker-compose up -d proxy
|
||
```
|
||
|
||
## Configure your keycloak server
|
||
|
||
I will highlight required configuration for docker protocol. You will need to add this option to your keycloak command line:
|
||
|
||
```
|
||
-Dkeycloak.profile.feature.docker=enabled
|
||
```
|
||
|
||
Then the defalt user can be configured via environment variables
|
||
```yml
|
||
services:
|
||
keycloak:
|
||
image: jboss/keycloak
|
||
environment:
|
||
KEYCLOAK_USER: admin
|
||
KEYCLOAK_PASSWORD: password
|
||
user: root
|
||
networks:
|
||
- registry-ui-net
|
||
command: -Dkeycloak.profile.feature.docker=enabled -b 0.0.0.0
|
||
```
|
||
|
||
Now you can start your keycloak server, it will be available on http://localhost/auth in my example.
|
||
|
||
|
||
```sh
|
||
docker-compose up -d keycloak
|
||
```
|
||
|
||
Now you need to configure your docker client with these steps:
|
||
|
||
Go to the keycloak home page: http://localhost/auth and click on `Administration Console`.
|
||
|
||

|
||
|
||
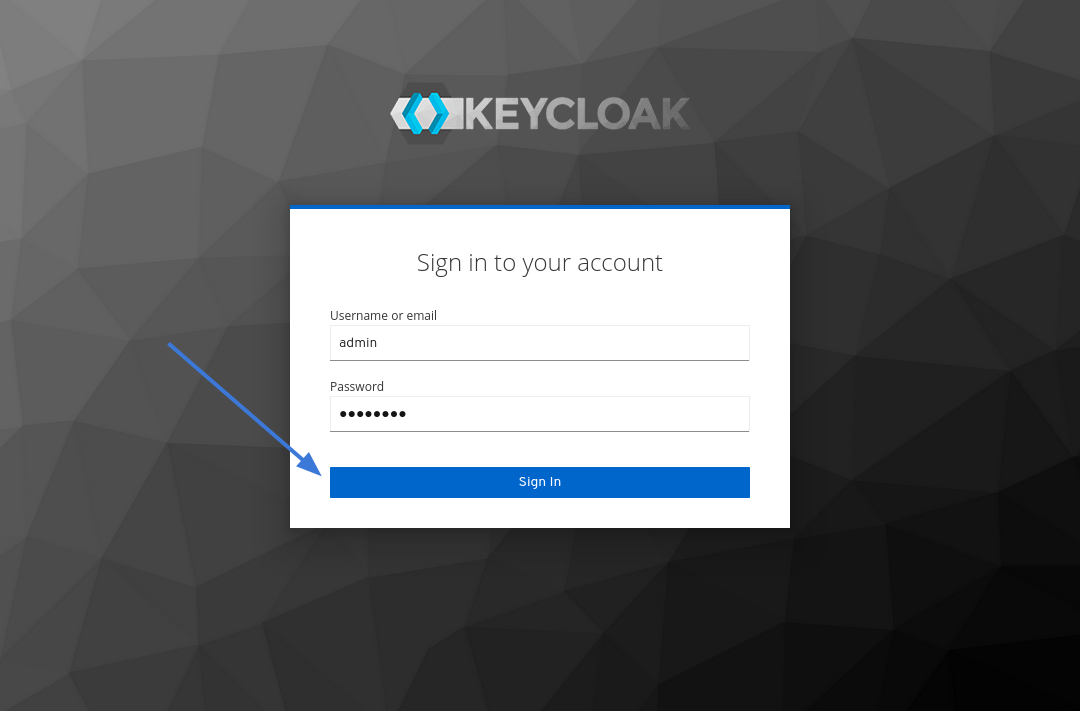
Sign in with your login and password (in my example it's `admin` and `password`).
|
||
|
||

|
||
|
||
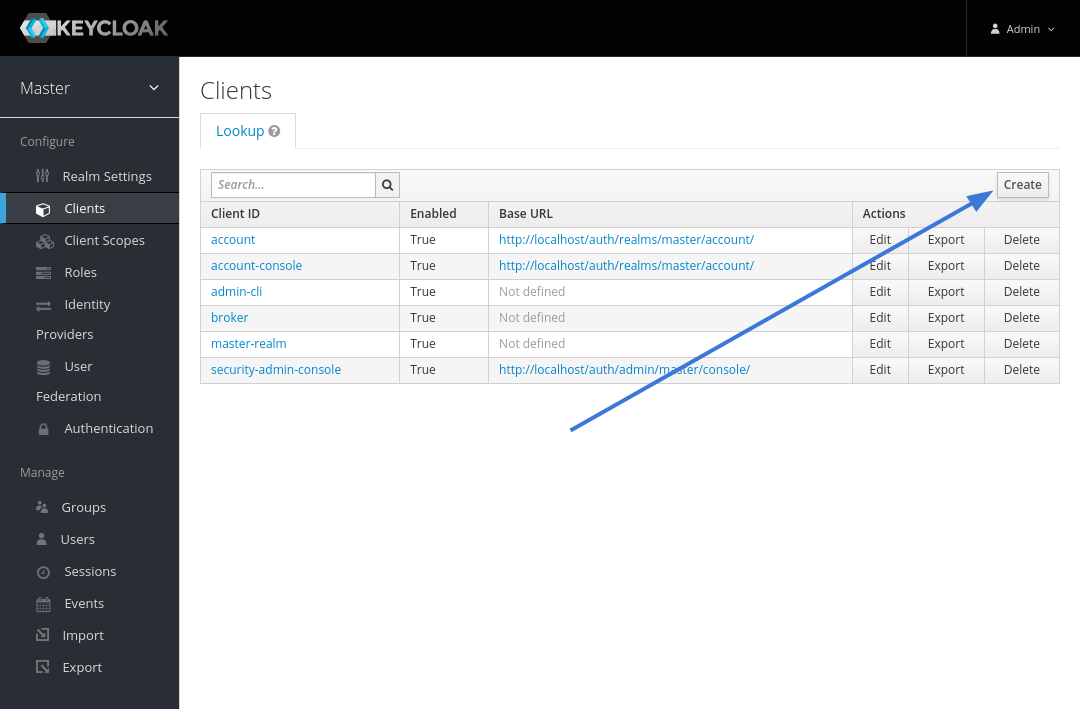
Go to `Clients` in the left side menu.
|
||
|
||

|
||
|
||
Create a new client.
|
||
|
||

|
||
|
||
Enter a name for `Client ID`, choose `docker-v2` as the `Client Protocol`, and click `Save`.
|
||
|
||

|
||
|
||
Navigate to `Installation` tab, choose `Docker Compose YAML` as `Format Option` and click `Download`
|
||
|
||

|
||
|
||
When you extract the archive, the resulting directory should look like this.
|
||
|
||
```
|
||
keycloak-docker-compose-yaml
|
||
├── certs
|
||
│ ├── localhost.crt
|
||
│ ├── localhost.key
|
||
│ └── localhost_trust_chain.pem
|
||
├── data
|
||
├── docker-compose.yaml
|
||
└── README.md
|
||
```
|
||
|
||
Copy all the files from `certs` folder to `conf/registry` (this will replace files generated for this example).
|
||
|
||
## Configure your registry server
|
||
|
||
The last step is the configuration of your registry server. The config file is located in `conf/registry/config.yml`. The import part of the configuration is `auth.token` where you need to set `realm`, `service`, `issuer` and the `rootcertbundle` from the previous archive.
|
||
|
||
```yml
|
||
auth:
|
||
token:
|
||
realm: http://localhost/auth/realms/{realm name}/protocol/docker-v2/auth
|
||
service: docker-registry
|
||
issuer: http://localhost/auth/realms/{realm name}
|
||
rootcertbundle: /etc/docker/registry/localhost_trust_chain.pem
|
||
```
|
||
|
||
Now you can start your docker registry with your docker registry ui.
|
||
|
||
```sh
|
||
docker-compose up -d registry ui
|
||
```
|